
How to Connect to Ring Doorbell That Is Already Installed: Practical Setup Guide for 2026
Learn how to connect to ring doorbell that is already installed safely and set up app access, chime pairing, and shared accounts for October 2026.
 By John R. Delaney
Updated October 3, 2026
By John R. Delaney
Updated October 3, 2026
Moving into a home with an existing video doorbell often leaves new occupants wondering how to gain access to the hardware left mounted on the doorframe. Determining how to connect to ring doorbell that is already installed requires understanding both account ownership protocols and device setup modes before you can view live video feeds. Previous residents frequently leave devices tied to their personal profiles, which halts standard setup until ownership transfers or the system undergoes a complete reset. Reviewing an overview of popular Ring video doorbells helps identify your exact hardware generation so you can choose the correct reconnection path.
Physical hardware checks are just as crucial as digital registration when taking over an existing installation. You will need to remove the protective faceplate, locate the setup button, and confirm whether the unit relies on an internal rechargeable battery or active low-voltage transformer wiring. Verifying your Wi-Fi network frequency ensures the device pairs smoothly without persistent connection drops or laggy visitor notifications. Taking the proper steps from the start ensures your entryway remains secure while granting you full administrative control over motion alerts and video recordings.
| Award | Product | SSG Score About SSG ScoreThe SSG Score is our own rating from 0 to 10, based on performance, design and build, ease of use, and value. It reflects independent research and is never influenced by manufacturers, retailers, or affiliate commissions. Learn more › | |
|---|---|---|---|
| Best Overall |
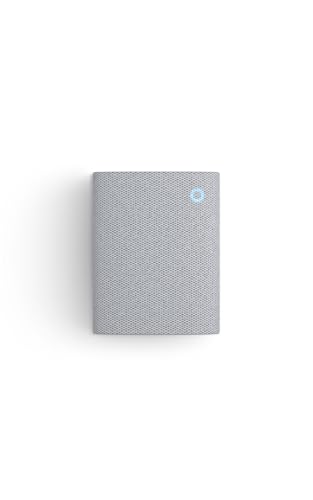
Ring Chime , Enhanced audio for real-time alerts
|
8.6/10 | Buy |
Connecting to an Inherited or Previously Mounted Ring Doorbell
Inheriting smart front door hardware offers immediate security benefits, but taking control of hardware attached by a previous resident involves several specific procedural stages. The process requires navigating cloud security ownership safeguards, inspecting hardware power delivery, and executing a fresh network configuration. Following a methodical sequence prevents common setup errors and ensures the doorbell connects reliably to your home Wi-Fi network.
Resolving Account Ownership and Device Transfer Protocols
Ring protects user privacy by binding each device MAC address to a single primary account holder. If a previous homeowner or tenant installed the hardware, their registered profile remains linked to the doorbell until they actively remove it. Attempting to register the unit in the mobile app while still claimed will prompt an ownership transfer alert on your screen. Reaching out to the previous resident to request device deletion from their app is the fastest method to clear this digital lock.
When contacting previous occupants is impossible, the Ring application provides an automated ownership transfer request feature. Scanning the device QR code initiates a verification sequence that sends an email notification to the original registered email address. The previous owner receives a grace period of several business days to contest or approve the removal before Ring releases the MAC address. Once the waiting period lapses without objection, the cloud database unlocks the unit, allowing a new administrative profile to complete registration.
Renters residing in leased properties may experience a different ownership structure that does not permit full account transfer. Landlords or property managers sometimes maintain administrative ownership of the primary device to oversee exterior perimeter hardware. In these rental arrangements, the property manager must send a Shared User invitation to your personal email address. Accepting a Shared User invite lets you view live video, speak through two-way audio, and receive motion alerts without altering master account settings.
Inspecting Power Sources and Verifying Operating Voltage
Before initiating network pairing, you must determine whether the installed doorbell relies on low-voltage wiring or an internal battery. Battery-powered doorbells often feature a removable faceplate covering a rechargeable lithium-ion pack, while wired models connect directly to bell wires. If the unit shows no illumination when you press the main push button, the internal cell may be completely depleted. Exploring wired versus wireless video doorbell options clarifies how power delivery methods alter long-term maintenance and performance.
Hardwired installations require a compatible step-down transformer delivering alternating current between 16 and 24 volts AC. You can test the bare low-voltage leads using a digital multimeter set to AC voltage mode after carefully shutting off the circuit breaker. Measuring the open-circuit voltage across the two terminal screws confirms whether the transformer supplies sufficient power under active loads. Insufficient transformer ratings below 16 volts can cause the doorbell to reboot unexpectedly whenever a visitor depresses the call button.
If the mounted hardware operates purely on battery power, you should remove the battery pack and connect it to a micro-USB or USB-C charging cable. Most battery packs incorporate dual LED status lights that glow orange and green during the charging cycle before turning solid green upon completion. Reinserting a fully charged battery ensures the unit has adequate reserve power to sustain continuous Wi-Fi radio broadcast throughout the pairing sequence. Reattaching the faceplate partially without locking the security screw leaves the setup controls accessible for the upcoming network configuration.
Accessing the Setup Button and Scanning Device Codes
Establishing a fresh connection requires physical interaction with the setup button concealed beneath the exterior protective shell. Ring equips these units with proprietary security screws on the bottom edge to discourage unauthorized physical tampering. You will need a matching star-shaped security screwdriver bit, typically a T6 or T15 size, to back out the lower fasteners safely. Using standard flathead or Phillips screwdrivers can strip the security screw heads and permanently damage the mounting baseplate.
Once the security screw is loose, gently lift the faceplate from the bottom edge and pull it upward to detach the housing. The internal chassis reveals a printed label displaying a unique QR code alongside a numerical MAC ID. You should capture a clear photograph of this label with your smartphone before proceeding with the physical installation. Having a digital backup of the QR code and serial number prevents needing to unmount the entire unit if the app fails to scan the physical sticker.
Locate the dedicated setup button positioned on the front, side, or rear chassis depending on your specific hardware generation. On many battery-powered units, a prominent orange button sits on the right side or beneath the front faceplate. Hardwired models frequently place this button on the right edge or near the upper perimeter of the camera frame. Pressing and immediately releasing this button places the internal microprocessor into broadcast configuration mode, indicated by a spinning light ring.
Executing a Hard Factory Reset on Unresponsive Units
Inherited hardware often retains previous network parameters that prevent the device from establishing a clean handshake with a new router. If the light ring fails to spin or the mobile application refuses to identify the device, performing a factory reset is necessary. A full reset purges cached network credentials, historical diagnostic logs, and residual configuration flags from internal flash memory. This diagnostic reset restores factory firmware defaults without altering any cloud-side ownership registrations.
To execute a complete factory reset, locate the primary setup button while the unit is receiving active electrical power. Press and hold the button down continuously for 15 to 20 seconds without releasing pressure. The circular LED ring around the doorbell button will flash rapidly multiple times to indicate the reset sequence has triggered. Release the button once the flashing begins and allow the onboard system controller up to two minutes to restart completely.
After the reboot concludes, the device automatically enters standard setup mode, signaled by a rotating white light pattern. Do not disconnect power or remove the battery while the LED indicators are cycling through the restart sequence. Interrupting the memory wipe process during a reboot cycle can corrupt internal settings and delay initial pairing. Once the light stabilizes into a gentle spin, the internal radio is ready to broadcast its temporary setup network.
Navigating the Ring Mobile App Setup Sequence
Begin the digital configuration by downloading the official Ring application from your smartphone’s application store. Create a new user profile or log in with your existing account credentials, ensuring two-factor authentication is active for account protection. Select the option to set up a new device and choose the video doorbell category from the hardware catalog. When prompted, point your smartphone camera at the physical QR code located behind the faceplate to identify the hardware model.
The application will prompt you to press the physical setup button if the LED indicator is not already spinning. Your smartphone must then connect to the temporary broadcast Wi-Fi network generated directly by the doorbell hardware. Modern mobile operating systems may display a prompt asking permission to connect to a local temporary network without internet connectivity. Approving this temporary local bridge allows your phone to transmit your home Wi-Fi credentials directly to the doorbell chipset.
Choose your home Wi-Fi network from the populated list and enter the corresponding network security passphrase carefully. Most legacy and budget video doorbells operate strictly on the 2.4 GHz wireless frequency band rather than 5 GHz channels. If your home uses a combined dual-band router with unified SSID names, temporary network band separation may be necessary. For renters or homeowners evaluating hardware alternatives, comparing wireless video doorbell models highlights how network bands influence signal stability through exterior walls.
Integrating Indoor Chimes and Wireless Audio Extenders
Connecting an existing doorbell often reveals that indoor audible chime boxes do not trigger when the exterior button is pressed. Many homes lack compatible low-voltage mechanical solenoids, or prior residents may have bypassed the original wall chime entirely. Without an operational indoor chime, household members must rely solely on mobile push alerts or smart speaker notifications. Adding a dedicated wireless audio accessory resolves this limitation by delivering clear acoustic alerts throughout interior living spaces.
Hardware accessories such as the Ring Chime plug directly into standard residential wall outlets to bridge this acoustic gap. The device features an upgraded speaker designed to deliver customizable tones, adjustable volume levels, and real-time alerts across your home. Pairing an accessory Chime involves plugging the unit into an outlet midway between your router and the front entryway. The Ring mobile app detects the plug-in chime through Bluetooth and Wi-Fi, allowing you to link it to doorbell motion and ring events in seconds.
Within the application settings, you can personalize audio profiles to distinguish between genuine ring presses and exterior motion triggers. Built-in snooze settings allow you to silence audio chimes temporarily during nap times or late evening hours. Placing multiple plug-in chime units across multi-story residences ensures you never miss a visitor even if your smartphone is charging in another room. This wireless audio architecture eliminates the need to troubleshoot complex low-voltage chime boxes or install mechanical bypass jumper wires.
Tuning Entryway Motion Zones and Latency Settings
Once the doorbell links to your home network, configuring software parameters prevents nuisance notifications and conserves battery reserves. Default motion settings often encompass public sidewalks, passing automotive traffic, and swaying porch foliage within the camera frame. Accessing the Motion Settings menu allows you to draw customized polygonal activity zones focused tightly on your private walkway. Activating Person Detection filters motion events so you only receive push notifications when human visitors approach the doorway.
Network performance at the front door directly determines the latency between a visitor pressing the button and your phone receiving an alert. You can evaluate connection quality by checking the Received Signal Strength Indicator (RSSI) value in the Device Health menu. An RSSI score between zero and -60 dBm indicates robust signal strength capable of sustaining smooth high-definition video streaming. Readings approaching -70 dBm or worse indicate substantial signal degradation caused by exterior masonry, stucco lath, or metallic entry doors.
If severe signal attenuation causes video buffering or audio delays, repositioning your home router closer to the front facade helps significantly. Installing a dedicated Wi-Fi mesh node or wireless range extender near the entryway can also restore reliable data transmission speeds. Testing live stream initiation from the mobile dashboard confirms whether the device connects within three to four seconds of tapping the screen. Crisp, low-latency performance ensures you can speak with delivery drivers or guests before they step away from the porch.
Verification Checklist and Final Testing Steps
Completing the setup procedure requires verifying all physical and digital operational aspects before walking away from the entryway. Press the exterior doorbell button to confirm the LED light ring illuminates and triggers an immediate chime strike or audio chime tone. Verify that your smartphone receives the incoming visitor notification promptly and opens directly to a stable two-way audio stream. Speak through the microphone to confirm full-duplex two-way talk clarity and test that the exterior speaker volume is balanced.
Reattach the protective faceplate securely over the doorbell chassis, listening for the internal plastic retaining tabs to snap firmly into place. Insert the proprietary security screw into the bottom threaded opening and tighten it snugly using your star-shaped security screwdriver. Avoid over-torquing the small fastener, which can strip the soft metal threads or crack the lower plastic lip of the faceplate. Securing this fastener protects the internal reset button, battery pack, and mounting plate from unauthorized removal.
Finish by reviewing your cloud video recording preferences and local device sharing permissions within the Ring mobile application. Ensuring your profile settings align with your daily routine guarantees consistent entryway monitoring without continuous false alerts. Taking full advantage of an existing video doorbell provides immediate front-porch security without the expense or labor of a brand-new installation.
About the author
John R. Delaney is a veteran technology editor and product reviewer specializing in home security, smart home devices, and wireless networking. With extensive experience evaluating connected security systems, cameras, smart locks, sensors, and networking equipment, he brings a practical testing mindset to consumer technology. His work emphasizes usability, performance, connectivity, and long-term value for homeowners building reliable smart security systems.